1. Leg Seal
A good leg seal is very important. Elastics should sit in the 'undie line' or where the leg and groin meet. Many parents wrap the nappy around the thighs which often creates a flat channel between the legs. You need to create a taco shape with the groin of the nappy so that liquid will hit it and absorb there. When the elastic is wrapped around the thigh with no curve to the absorbent part of the nappy, the wee can just pool in the elastic area and drip out the legs.
2. Rise Adjustment
The little snaps up the front of the nappy adjust the rise. There should be no lose fabric in the rise and it should not be adjusted so tight that it pulls the nappy down to create a gap at the waist.
To secure the snaps, snap to the right setting and fold the fabric (rather than scrunch) up and behind so it cannot be seen. Watch here for a visual guide.
3. Waist
The waist should leave no gaps but not create any sort of tension on your child's skin. You should comfortably be able to pop two fingers in without it feeling too tight.
4. Pulling it all together
So now you know what each part of the nappy should be doing and look like, how to you put it on so it sits like those nappy company photos - super trim, neat and firm.
Firstly position the nappy so the back sits just above babies bottoms.
Secondly, pull the front of the nappy through the legs and up towards the belly button stretching out the elastics. Then snap on the waist.
Run one finger around the leg elastics to even them out and tuck them into the leg creases.
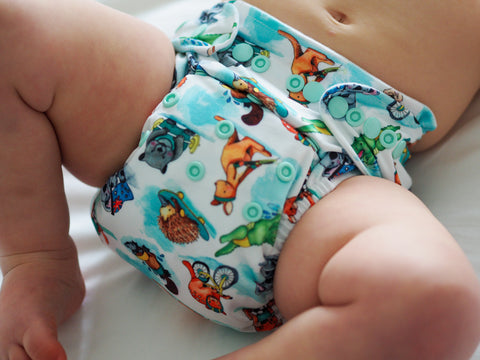
Your nappy should look like this:

Follow our Instagram for more video links to help you perfect the fit! It really will make all the difference for how well the nappies fit under clothes, how long they last and to get the maximum absorbency from them.
